
Another big day of Age of Sigmar which saw me achieve another win and my second loss for the tournament weekend. Going 2-1-2 with a convincing win in the start, where a misplay caused me to drop in 2 points overall (stupid glossamid Archers). But over all the weekend saw Glutos die once, but more on that in a moment.
So lets go back to yesterday and expand on Death or Riches day 1.
Game 1 – Geomantic Pulse:
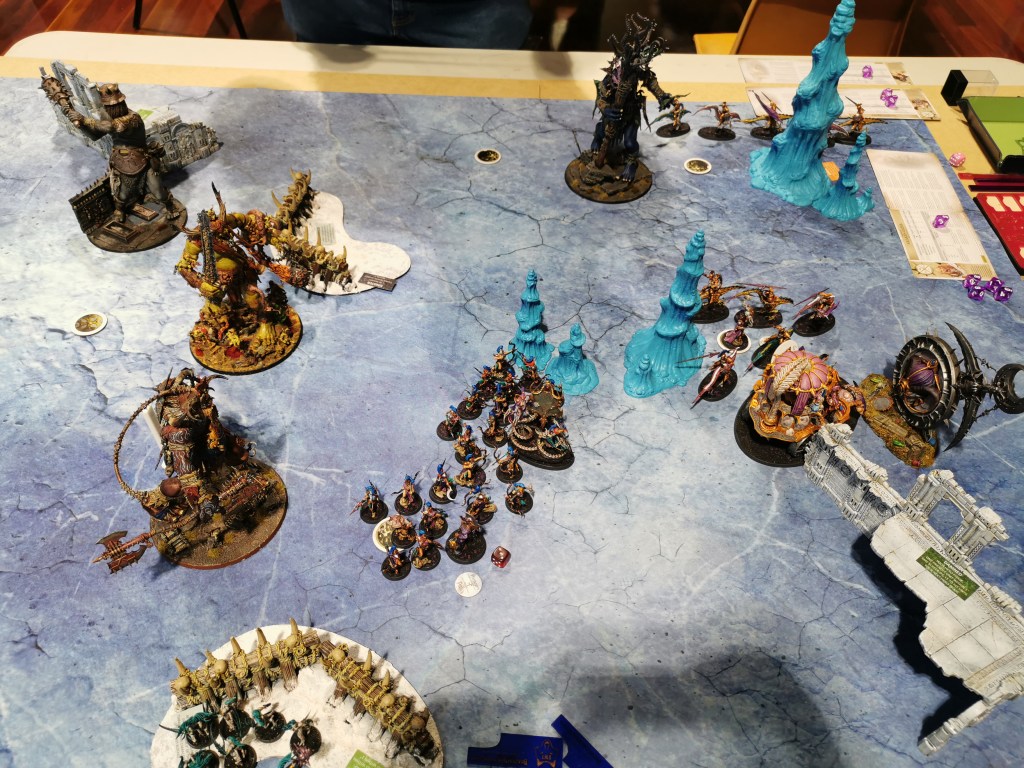
Some defining moments for day 1, of which there were a few, that lead to the draw. Deployment was tight and the desire to impress was high. This is the normal, in my experience, for all 1st days for the tournament where depending on how you go it sets the mood for the next four games. Deploying in my castle build with hellstriders taking a far flank I wanted to pin the orruks into a corner and have control over the board. I set up my The Masque within 4 of his Ardboy frontline and got ready to generate some depravity. With the terrain and setup this left very little room for setup which caused my first blunder. The deadly terrain.
Normally not a huge issue but in this case I lost 3 blissbarb archers due to the deadly terrain. No biggy I can bring them back. Now the first casting roll of the game to get mystic shield out. I got a 5, a 4 and a 1. I really wanted to ensure Glutos would remain safe so I was reminded that I had primal dice. Excellent, except the primal miscast, my second momentous blunder. Glutos took 6 damage and ignored none, I killed another 3 blissbarb archers from my already injured list (down 6), 3 from the next and 2 daemonettes. Ouch.
The rest of it was pretty straight forward. Charge in the masque, generate (10) depravity, move the heroes up more, shoot some Gore Grunters and Orruks and castle up on objectives. This led to the next turning point. Focusing of Glutos. Now its not wise to focus Glutos at any time and with his Wurrog prophet he is just such a tempting target to receive the mask to the face. But in this case it killed his character and only did 4 wounds to Glutos. I did leave my back open and I ended up losing my blissbarb archers to an ardboy charge, but the unleash hell generated depravity and reduced their models – but it wasn’t worth it in the end.
Gore grunters tore through hellstrider screens and more ardboys slogged my daemonettes. Glutos killed the megaboss on foot and anything around him maxing out my depravity and with it I manged to summon a keeper of secrets in the last round. Failing a 9″ charge I failed to take back another objective that would see me score more points than my opponent and having difficult battle tactics this season, and scenario, it was a draw.
Game 2: Every Step Forward
Second round I was against The Ossiarch Bonereapers. Now I have played them a few times but a few mistakes cost me the outright hard win instead of a winning by just a point. My deployment in this scenario meant that I spread out too castle-like and didn’t have my archers within range of the targets I wanted to remove. This lead to a poor economics when it came to generating depravity turn 1 and leaving myself open to a Morghast charge. I misplayed the Masque which failed to kill his generate and I generated only half the depravity I wanted to, only generating 6 instead of an average 10. This lead to a late snowball for Slaanesh.
The second mistake was letting the Morghast get into my castle and shutting down commands. They died quickly but I had two units of 3 stalkers mow down my screens and get into my core too easily. But they all under estimated my Lord of Pain and Glutos which helped bring back the goods. The shardspeaker of slaanesh got a few key Twisted mirrors off which saw a spike in depravity as well as her charge into melee that killed a stalker.
With the summoning of a vice Leader I managed to score all but one battle tactic, but failed my grand strategy. Which nearly cost me the game but I won based on number of battle tactics won.
Game 3: Spring the Trap!
Twice in a row I fought OBR and this list was a beefier version of the one I fought in round 2. Now this one saw neither of us remove models from the battle field and, as my opponent said, the game was theirs to win. A few small mistakes and A LOT of offered depravity made this harder than it should have been. Glutos and the lord of pain were the real heroes here while my hellstriders screened, helped achieve battle tactics. A unit of Daemonettes backed up with the shardspeaker and Contorted epitome secured my left flank and secured objectives whilst removing threats to the at side while my core shifted and collapsed around targets to my right. I believe I forgot to add some bonus’s here by my rolls were below average for an army that is hitting at a 2+ average and wounding on a 3+. It came down to Bracing for a 8″ charge from Immortis guard which won my opponent the game by 2 points.
Day 2
Game 4: No Risk without Reward
Against a Sylvaneth and witnessing a unit of 9 spiterider lances. This list also featured Gotrek who I wanted to keep out of my front lines at all cost. This one here was a relatively easy matchup for me as my theme of overwhelming overlapping buffs and debuffs really hurts the woodland beings. Forcing Gotrek to have 1 attack whilst around my Lord of Pain and stacking buffs on my core I was able to out manoeuvre and dominate the battlefield with my fast moving daemonettes and hellstriders. My blissbarb archers picked off a few units which saw his army retreat to a corner. However this meant I had to move my army up and close to Gotrek to score. Not a huge issue as my depravity exceeded 40 in this game but when Gotrek charged Glutos I was prepared for the worst.
But it didn’t come. Gotrek did a total of 4 wounds (after wards) to Glutos who dealt 5 back, then my Contorted Epitome dealt 2 wounds leaving the angry dwarf on 1 left. The Contorted epitome died in return but it ended up being worth it when Glutos only barely managed to deal 1 wound, after wards and saves, into Gotrek the next turn which saw the dwarf fall.
The only reason I didn’t max out my points this turn was the never ending spiterider riders preventing my battle tactic and me forgetting that Glossamid archers can unleash hell then retreat which caused me to fail a battle tactic. Oops!
Game 5: Nexus Collapse.
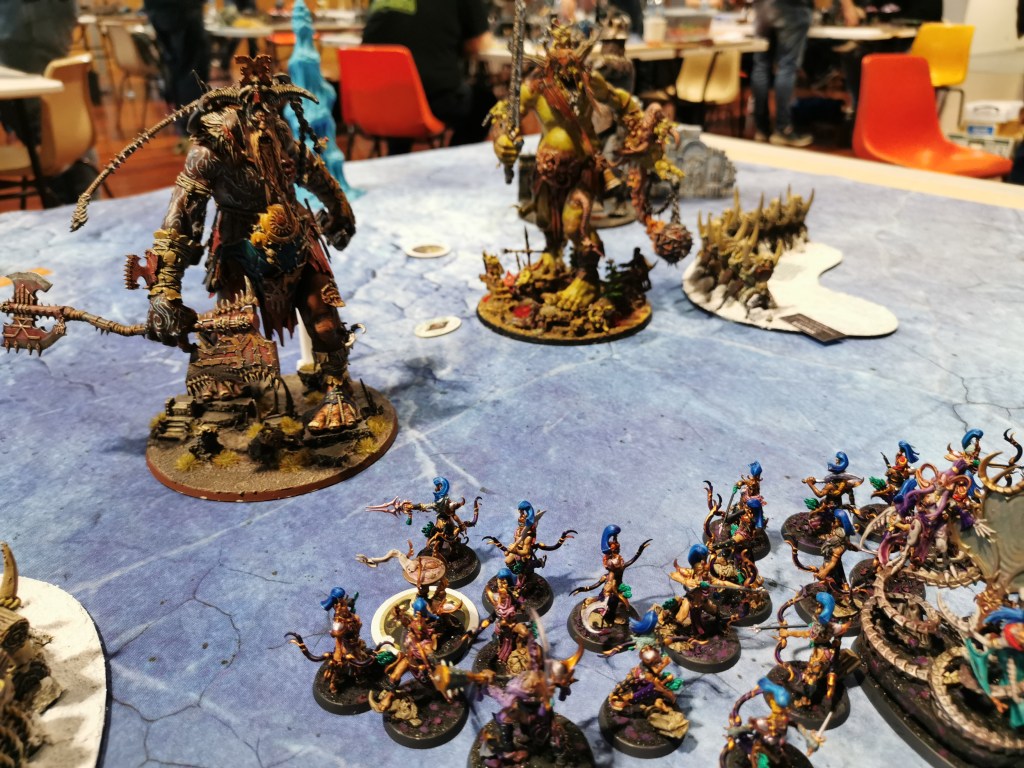
Now this one is a hard one to talk about. 4 mega gargants. King Brodd, a warstomper, gate breaker and kraken eater. I haven’t had much interaction with Mega-gargants before and my few experiences were that they hurt. But in this case it was like my army wasn’t even there.
Turn 1 I managed to deal 12 damage to the gate breaker and 8 damage to Brodd. Then the gate breaker and war stomper got into my front lines which crumbled instantly. I went from 2000 points to around 1000points in one turn. After that it was more or less game over. Playing for what I could get and overlapping buffs I manged to get the gate breaker down to 10 wounds remaining before I had Brodd, the Warstomper and Gate breaker charge Glutos and the big guy didn’t last long.
Now despite being demolished the last game was incredibly enjoyable. The guy I played against was in it for chill times and to roll dice and he has done an AMAZING job on these mega gargants. Just look at the conversion work on them!
After a big weekend the brain drain and metal fatigue is nuts. So I will have to leave it here and apologise for not having more photos. Just some things are hard to remember to do when you have a complicated technical army to run with.
Thanks for stopping by!
The Brazen Wolfe
