Hi all, a short soulbound update using the pro features from Inkarnate (not a sponsor – maybe one day it will mean something to say that!).
I asked a few veterans to RPG systems over the last week to help me explore how to run Soulbound campaigns in the future so I whipped up a few encounters each increasing in difficulty to see what the limit is with the number of creatures I throw at them.
So lets look at the encounters planned so far.
Encounter 1 – Ambush at Traders pass
For this encounter I have a 10 creature swarm of grots, 4 squig hoppers, 10 creature swarm of squigs (squig herd) and a fungoid cave shaman. The creatures ambush the party on the road as they are moving from where they underwent the soulbinding to Anvilguard (or maybe Brightspear – this is meant to drive out some connections between the party and let new players explore the system without too much risk to permanent death.) The squigs charge at what ever they find after a comical entrance (one falling down into the middle of the road then the rest of the swarm rushing forward to attack what ever they see) then the bounders attacking cackling madly as the 10 grots rain down arrow fire upon the wagon (Causing it to flee) from behind the logs and in the dense trees.
The Shaman stands atop the hill and throws spells and insults at the party screaming “Get them, feed my squiggies, get them get them!”
The zones are easy. Zone -1 (Zone 6 I guess) is the tress to the bottom left of the map, Zone 1 is the road, zone 2 is the trees to the top of the map, zone 3 is the clearing before the hill, zone 4 is the hill, zone 5 is the bottom right trees.

The encounter was easy for the party, Spread on ranged weapons and a pretty strong melee fighter that can dish out enough damage to kill a swarm by themselves made it a cake walk. The squig herd died down to 3 creatures from the first shot (stand and shoot talent) the squig hoppers died in melee but did some damage – which the branchwych managed to heal back very quickly. The Range on the rifle got a few damage on the shaman (who fled leaving a bloody trail to the next area), the grots didn’t do much apart from the plot hook but the volume of dice rolled meant that a few damage got through good defence. The Shaman did the most damage but failed two spells! (out of three being cast with his once per battle, and mettle being spent).
The Squig Pit – Here we had three units of 10 creature squig herds, four squig herders and a loonboss on giant cave squig. This was 3 swarms of 10 minions, four warriors and one chosen. The chosen was super strong here and the minion swarms hurt a lot – despite the group being able to demolish all of them.
Called shot meant that the loonboss spent most of his time on his back AND stunned – both are very powerful but when he did finally get to attack (from hiding) he managed to inflict deadly wounds on two different characters – this was quite the surprise to the party. The squigs did a lot of damage this time with the herders and the loonboss buffing their attack profiles up a rank on the ladder (to a total of two rungs!).
The layout was confusing here. Top of the fallen tree and the road and the trees was zone 1 upto the rocks above the cave, below the fallen tree and upto the rocks was zone 2, the rocks were zone 3, the pit and walkway was zone 4, the northern ledges were zone 5m the bottom ledges were zone 6 and the cave was zone 7. This is another ambush IF the party cant sneak up (stealth(body) checks) – if they succeed on stealth they ambush the grots, if they dont the get ambushed by squigs in the forest and one in the pit.
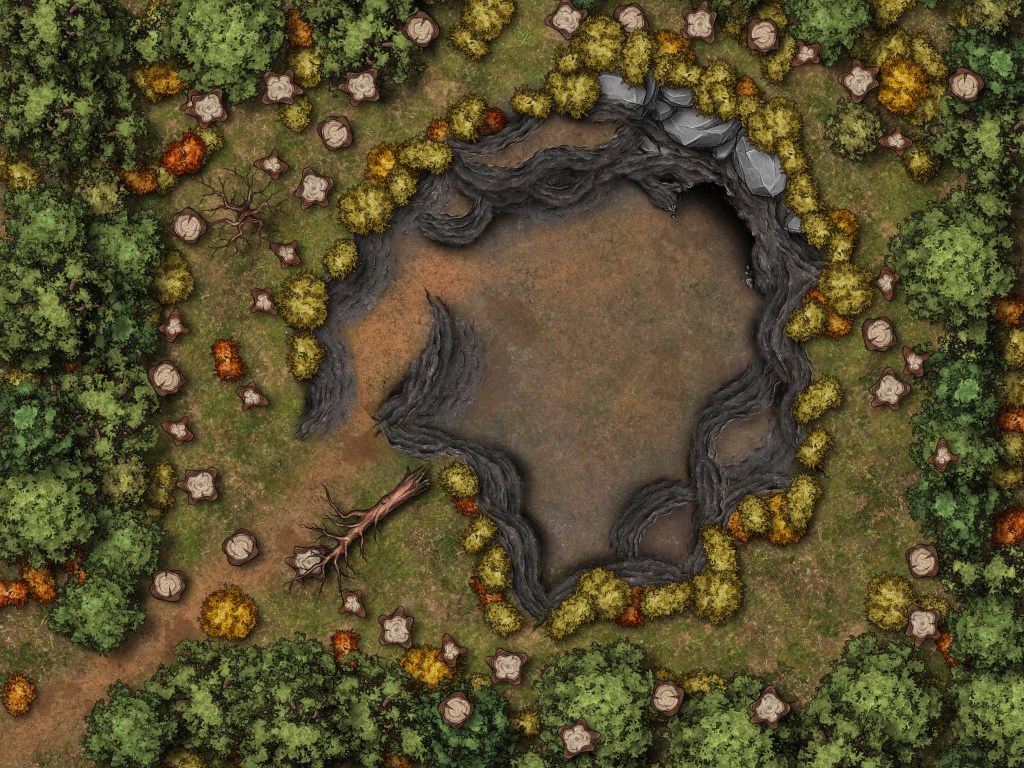
This encounter saw two characters get deadly wounds and only through the branchwych healing and casting Thorn shield every round did we see the party not take more wounds. The note here is to decrease difficulty (or number of creatures/units.. things) if there is extreme synergy.
Thanks for looking into my madness a bit, I anticipate that future sessions will see more updates and hopefully more maps as I see the different in details with the pro version of Inkarnate makes these maps look much better as both of these maps were made by hand – well mouse and keyboard by myself.
Don’t forget to look out for my end of week write-up also coming out later tonight and as always, don’t forget to roll with advantage,
The Brazen Wolfe
